O2 Video IN - Capturing a Video from the VCR to the Computer
Console and Disk
Machine Preparation:
-
Turn on the VCR (and Monitor), insert Video tape (VHS or S_VHS tape).
-
Check that the cabling between the computer and VCR is correct.
-
Cables go from the O2 Video Output to the VCR Video Input
to enable recording from a computer application to a video tape.
Both the O2 and the Onyx2 use the VCR Video Input for video production.
Thus, make sure that the O2 cables
(S-Video and Audio - if used) are connected to
the VCR's Video Input. The Onyx2 S-Video and Audio Cables are bound together
with a wire tye - The O2 cables are not. The Onyx2 S-Video cable has
a green stripe on it. Buttons and switches on the Front panel of the
VCR should be set as
visualized in the Cables, Switches, Buttons
page.
On the SGI subgum:
-
setenv DISPLAY :0.0
/usr/gfx/setmon -Fg 60
-
This will frame lock the video signal and graphics.
-
The first time you use the video equipment, copy
/tools/aml-estarose/video/videopanelrc
to
.videopanelrc
in your home directory
-
This file contains the settings for
reading from and writing to the VCR - S-Video Input & Output.
-
type:
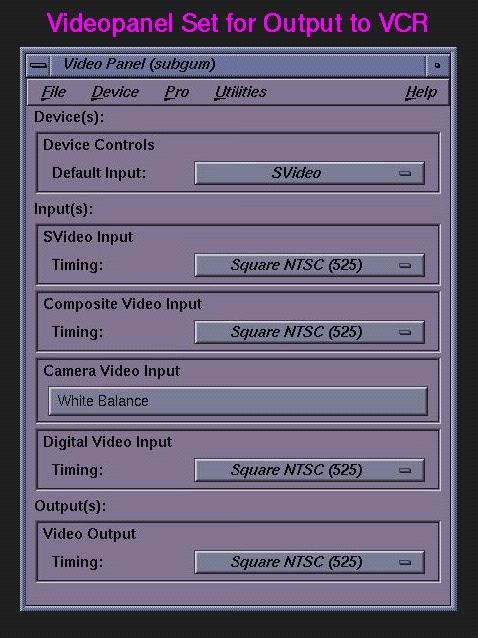
videopanel
-
select file/"restore Setting" from top menu bar
-
This will load the .videopanelrc file from your home
directory containing the settings for
the VCR - S-Video Input & Output (The default settings are for
the O2 Camera).
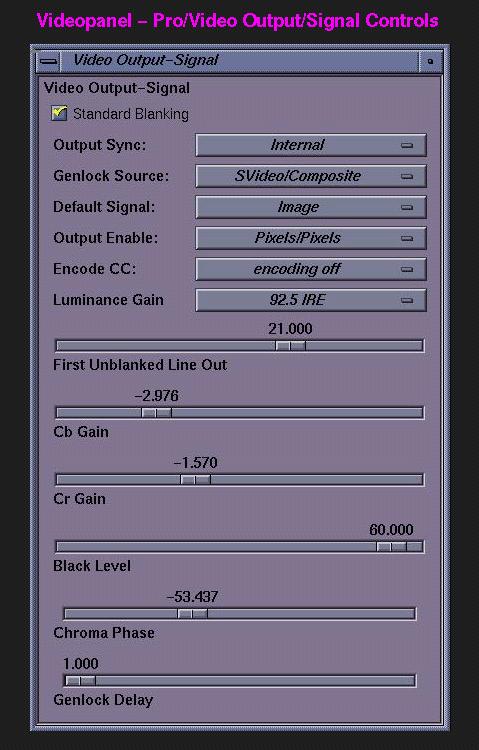
The videopanel will then have the settings shown in these illustrations:
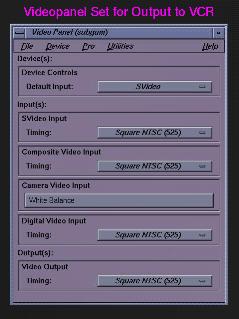
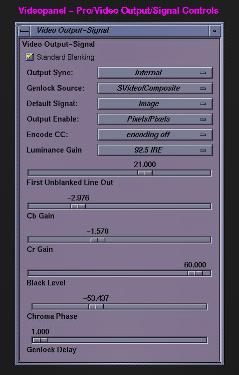
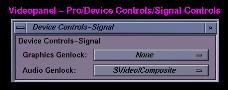
-
To view the video on the Computer Console: Select Utilities/"Live Video Input" from the top menu of the videopanel
If you have previously used Utilities/"Live Video Output" , close that window
since only one of the two applications can be used at a time.
A rectangular window will appear which is the size of NTSC video
(645x484 pixels).
-
To Capture the Video to a File on the Disk run:
mediarecorder
See instructions about running mediarecorder below.
-
To view the video press the
play
button on the VCR
mediarecorder: How to use this SGI application to capture a movie
-
cd to /subgum.tmpa
-
mkdir "your login name"
-
cd to this directory
-
run: mediarecorder
-
Running mediarecorder on this dedicated disk will assure that the scratch files and eventually
the movie file will be written to this disk attached directly to subgum.
Close all extraneous applications and windows.
These 2 actions will assure the best performance in capturing the video.
-
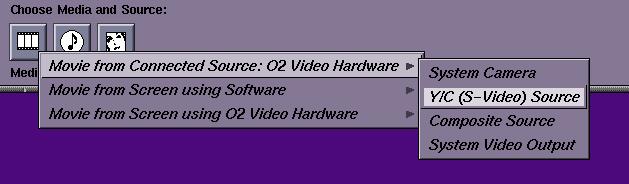
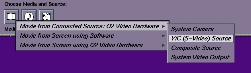
Click on Movie icon button
 (leftmost button at lower left of window)
-
Select "Movie From Connected Source: O2 Video Hardware"
Then "Y/C (S-Video) Hardware"
-
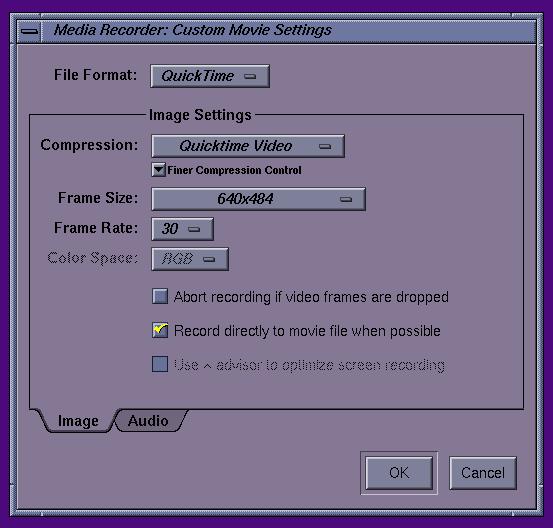
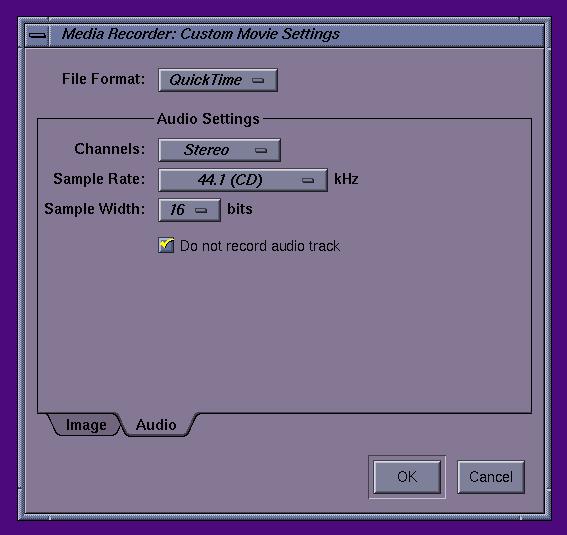
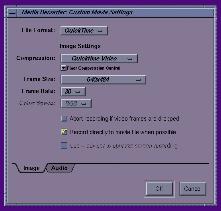
From top menu bar select Tasks then "Show Task Settings"
-
Image frame:
Change the Frame Size: to NTSC (640x484) - to get a full sized image
-
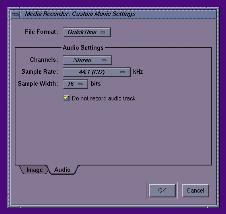
Press Audio Button at bottom of Window: In Audio window check "Do not
record audio track" if audio isn't required.
-
To start the video press the
play
button on the VCR
-
To start the video capture press the red circle icon at the lower right on
the "Media Recorder" window.
-
To finish the video capture press the blue square icon to its left.

-
A small window will appear indicating " processing movie". When the processing
is finished the file name movie1.mov will appear in the column on
the right of the "Media Recorder" window. Clicking on the icon will
play the movie. Clicking on the name will allow you to change the name
of the file.
Run: mediaplayer
to play the movie
Run: moviemaker
to edit the movie
Audio, Playback
-
Playing audio with the video
Hints for best performance:
-
Capture the video on the dedicated scratch disk, /subgum.tmpa
-
This disk is writable by all users. Make a subdirectory with your login
name and cd to this directory , then run mediarecorder from there.
Afterwards move the captured file to a permanent disk file system for storage.
/subgum.tmpa is for scratch purposes only, thus the file will be
removed eventually.
-
Close all other applications and windows
SGI Documentation on the Video Panel:
-
The Video Panel: html version
-
or Digital Media Tools Guide/Appendix A: The Video Panel
from SGI on-line books - type: insight